Essential Initial Setup Guide for Ubuntu on AWS EC2 Instances
When setting up a development or testing environment on AWS EC2, starting with the right configurations for your instance is essential. This guide walks you through the initial setup steps for Ubuntu 22.04 LTS, ideal for those utilizing the free tier to keep costs down. We’ll cover the basic configurations without going into services like Route 53, ELB, or RDS, making this guide perfect for straightforward, essential setups. Whether you’re a beginner or an experienced developer, having a well-configured instance can save you time and prevent common issues. This guide ensures your Ubuntu server is set up correctly, allowing you to focus on your projects rather than troubleshooting. From setting up key pairs for secure access to configuring the firewall and storage, we’ve got you covered. Follow these steps to create a stable and efficient environment for your development or testing needs. This translation was provided with the assistance of Microsoft Copilot.
Medium 에도 발행하고 있어요.
Amazon EC2에서 개발 또는 테스트 환경을 설정할 때는 인스턴스를 올바르게 구성하는 것이 중요합니다. 이 가이드는 Ubuntu 22.04 LTS 초기 설정 단계를 안내합니다. 비용 절감을 위해 무료 티어를 사용하는 경우에 특히 유용합니다. Route 53, ELB, RDS 등의 서비스는 다루지 않으며 기본 설정에 중점을 둡니다.
1. 서버 기본 설정
EC2 사양
| EC2 설정 항목 | 설정 값 |
|---|---|
| 이미지(AMI) | Ubuntu Server 22.04 LTS (HVM), SSD Volume Type |
| 인스턴스 유형 | t2.micro |
| 방화벽(보안 그룹) | launch-wizard-9 |
| 스토리지(볼륨) | 1개 - 30GB |
| 키 페어(로그인) | Key pair file |
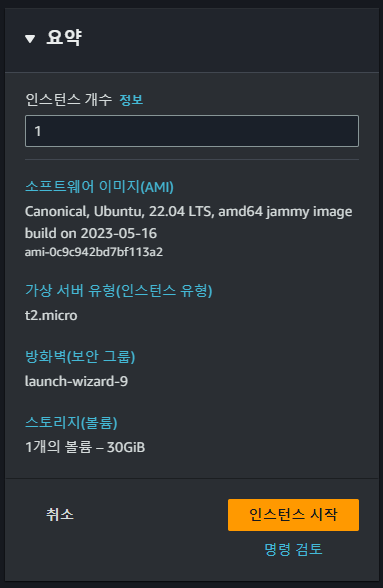
EC2 사양 설정
개발 또는 테스트 용도로는 높은 사양이 필요 없습니다. 무료 티어 모델로 충분합니다. launch-wizard-9 보안 그룹은 인스턴스를 생성하면 자동으로 생성되는 기본 설정값으로, 22, 80, 3306과 같은 API 개발에 필요한 포트를 모두에게 열어놓습니다. 보안을 강화하려면 OpenVPN 과 같은 도구를 사용해 IP 주소를 고정하고, 이 IP들만 포트에 접속 가능하도록 설정하는 것이 좋습니다.
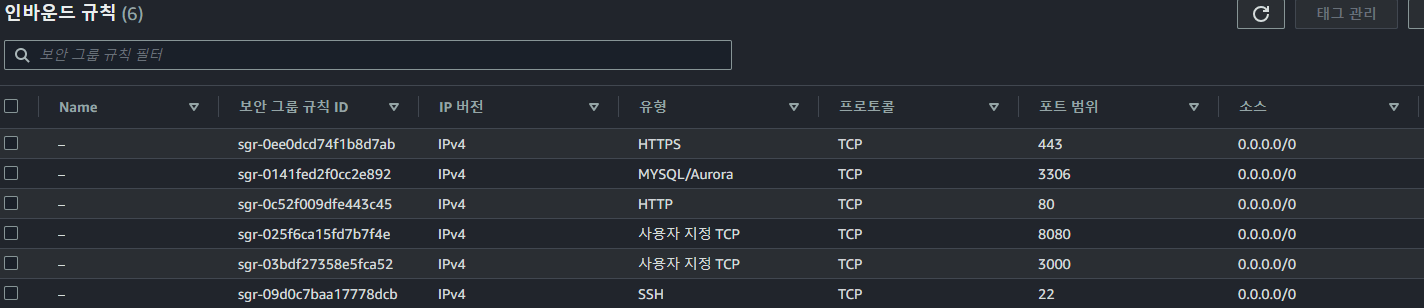
보안그룹 Inbound 설정
ubuntu 계정으로 로그인하며, 비밀번호 대신 키 파일을 사용합니다. PuTTY, Termius 같은 관리하기 용이한 프로그램을 사용하시면 편리합니다. ppk 파일이나 pem 파일을 다운로드 받아서 로그인합니다.
2. hostname 변경
ubuntu@ip-172-0-0-0:~$ sudo hostnamectl set-hostname test
ubuntu@ip-172-0-0-0:~$ sudo reboot

# hostname 변경 완료
ubuntu@test:~$
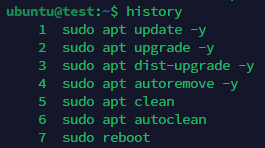
3. Ubuntu update
ubuntu@test:~$ sudo apt update
ubuntu@test:~$ sudo apt upgrade
ubuntu@test:~$ sudo apt dist-upgrade
ubuntu@test:~$ sudo apt autoremove
ubuntu@test:~$ sudo apt clean
ubuntu@test:~$ sudo apt autoclean
4. history 형식 변경
기존 history 형식
# history 형식 변경
ubuntu@test:~$ sudo vi /etc/profile

# 가장 하단에 아래 내용 추가
# VIM 기준 Shift + G 누르는 경우 가장 하단으로 이동
HISTTIMEFORMAT="[%Y-%m-%d %H:%M:%S] "
export HISTTIMEFORMAT
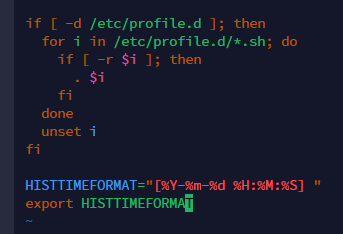
HISTTIMEFORMAT 내용 추가
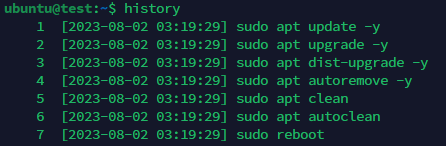
history 형식 변경 완료
5. history cache 늘리기
# history cache 늘리기
ubuntu@test:~$ sudo vi /etc/bash.bashrc

# 가장 하단에 아래 내용 추가
# VIM 기준 Shift + G 누르는 경우 가장 하단으로 이동
export HISTSIZE=10000
export HISEFILESIZE=10000
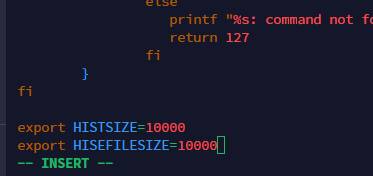
HISTSIZE 및 HISEFILESIZE 내용 추가
6. locale 한국으로 설정
# 현재 locale 확인
ubuntu@test:~$ locale
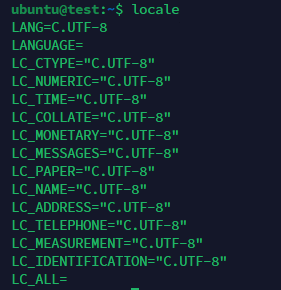
현재 locale 설정 값 확인
# 한글 언어팩 설치
ubuntu@test:~$ sudo apt install language-pack-ko

# 한글 적용
ubuntu@test:~$ sudo update-locale LANG=ko_KR.UTF-8 LANGUAGE="ko_KR:ko:en_US:en" LC_MESSAGES=POSIX

# 재부팅 후 적용
ubuntu@test:~$ sudo reboot
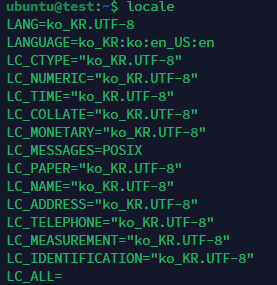
locale 변경 완료
7. timezone 한국으로 설정
# 타임존 확인
ubuntu@test:~$ timedatectl
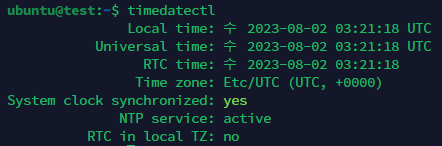
현재 timezone 설정 값 확인
#서울 타임존 있는지 확인
ubuntu@test:~$ timedatectl list-timezones | grep Seoul

#타임존 서울로 변경
ubuntu@test:~$ sudo timedatectl set-timezone Asia/Seoul
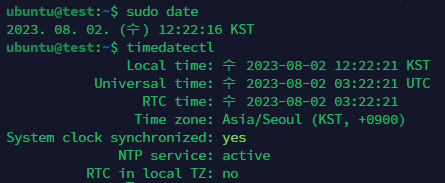
timezone 변경 완료